

However, there are several ways you can ease into crow pose with other poses. Here’s why you should consider including crow pose in your yoga practice, plus crow pose progression moves to practice if you’re struggling with it.
In This Article
-
01
-
02
Experts In This Article
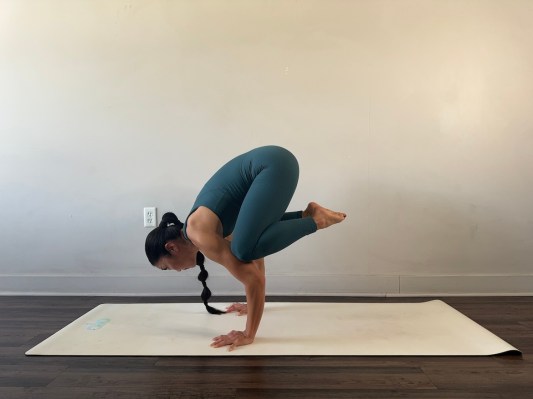
First things first: What are the benefits of crow pose, anyway?
Practicing crow pose helps you build balance, stability, and strength throughout your body.
“Crow pose requires a lot of core strength—not just shoulder and arm strength,” says Tamara Teragawa, a yoga instructor and master trainer with YogaSix.
It also helps you practice your focus and mindfulness, a key part of yoga. When you enter a crow pose, also known as Bakasana, you need to be fully engaged and aware of your body’s movements to stay balanced. This can help you achieve a greater mind-body connection and self-awareness, per ULU Yoga.
Related Stories
In fact, there are many mental health benefits of practicing yoga in general. It has been found to be effective in decreasing anxiety (even more so than aerobic exercise), per a 2021 study in Issues in Mental Health Nursing. It can also lower symptoms of depression and help you sleep better, according to a 2023 clinical trial in Complementary Therapies in Clinical Practice.
“I’m a strong believer in finding progressions and different ways to try out a new posture like this, before actually executing the ideal pose.” —Tamara Teragawa, master trainer with YogaSix.
Why you may not be able to do crow pose, plus progressions to get you there
1. You have reduced wrist mobility
“The range of motion of your wrists is very important for a lot of things, but especially for hand balancing postures like crow pose,” says Teragawa. “The wrists tend to do a lot of work for us, but are not always the most mobile and strong once they need to bear weight.”
To work on your wrist mobility, try an inverted wrist stretch:
- Start in a tabletop position.
- Keep your palms facing the floor and rotate your hands so your fingers face toward your body and the heel of your palm faces away.
- Try to relax your shoulders and press the heel of your palm forward and down into your mat.
Next, try inverted flipped wrists and fists:

- Start in a tabletop position.
- Rotate your hands so your fingers face toward your body. This time, place the backs of your hands to the floor and have your palms facing up.
- Press all 10 fingernails into the mat as you inhale—and try to make a fist with your hands on the exhale. This will increase your wrist and hand mobility, while also strengthening them. Try to relax your shoulders and press the heel of your palm forward and down into your mat.
“With both, the further your hands are away from your body, the more intense the stretch is,” Teragawa says. “The closer your hands are toward your body, the less intense the stretch is.”
2. You don’t have enough hand strength
In crow pose, you’ll find that having more strength and control over your hands will make it easier to balance.
“Being able to use your hands against the floor to support your body is key to any hand balancing posture,” Teragawa says. “They have to act as your ‘feet.’”
That said, it can be challenging to learn how to engage your hands against the floor. One way to practice this is with a high plank:
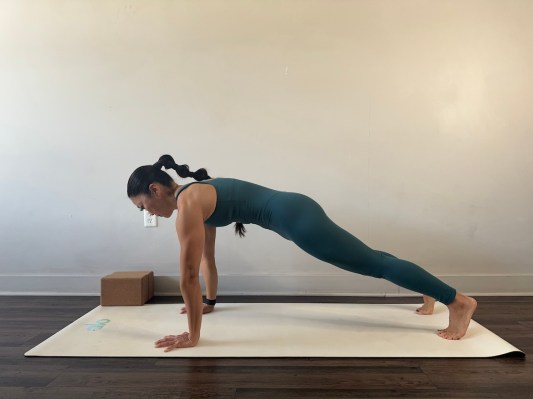
- Lie on your stomach with your palms on the floor underneath your shoulders and your feet flexed with the bottoms of your toes on the floor.
- Lift yourself up into the top of a push-up position. Your body should make a straight line from your heels through your hips to the top of your head.
- Press all 10 finger pads into the floor and feel the center of your palm come off the mat.
- Draw your belly button toward your spine and squeeze your glutes.
- Look at the floor directly below your head to keep your neck in a neutral position.
- To intensify the muscular engagement, shift forward and allow your shoulders to move past your wrists, while still maintaining a connection between the mat and the heel of your hand.
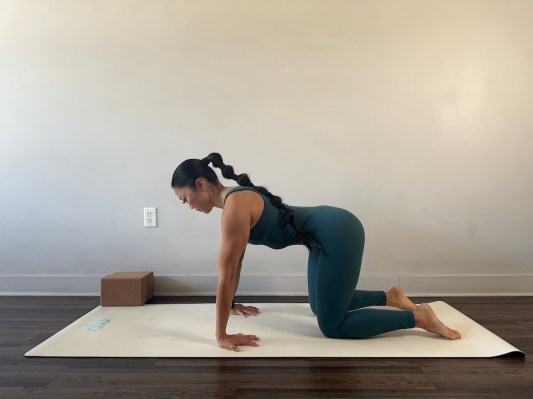
To simplify this, you can also modify it to a tabletop position. Engage your hands in the same way, keep your core tight, and shift forward in your tabletop position.
3. You don’t have enough core strength
Crow pose requires a strong core for its floating movement. “It’s the muscles of your core that help connect your knees to your triceps and float your feet away from the floor,” Teragawa says.
To strengthen your core, practice boat pose:
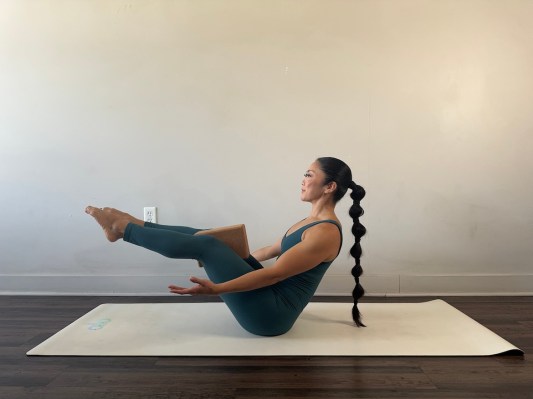
- Sit on your mat with your knees bent and feet flat on the floor, arms at your sides.
- Lean slightly back with a long spine as you engage your abdominals. Feel your upper back light up to keep your chest lifted.
- Squeeze a block between your thighs for more engagement in your legs and lower abdominals. For more intensity, lift your feet off the floor and reach your arms forward.
You can also try a supine crow pose, which will help you practice a familiar movement to crow pose—without placing weight on your hands:
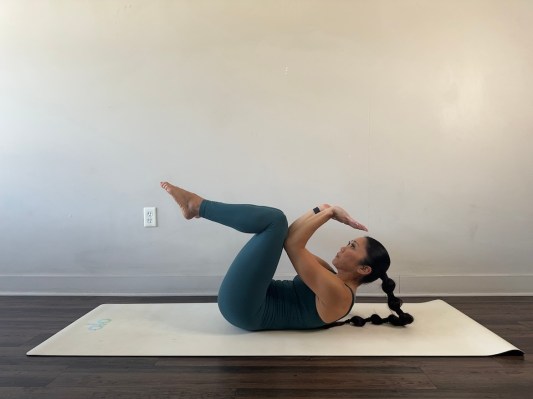
- Lie on your back and draw your knees in toward your chest.
- Curl your tailbone off the floor and lift your shoulders and head off the mat as you press your lower back into the mat and draw your belly button to your spine.
- Extend your arms shoulder-width apart and flex your forearms and wrists as if you’re placing them on the ceiling.
- Aim to bring your knees in toward your elbows as if you were in crow pose on your back.
- Try to hold and maintain the connection between your triceps and knees for 20 to 30 seconds before coming out of it. Do this a few times and see if you can increase the amount of time you sustain that hold.
“Focus on how hard your abdominal muscles need to work in order to keep that knee-to-triceps connection,” Teragawa says. “I’m a strong believer in finding progressions and different ways to try out a new posture like this, before actually executing the ideal pose.”
4. You don’t have enough shoulder strength
Shoulder strength and stability are key parts of not only accomplishing crow pose, but practicing it safely.
“There are lots of ways to build shoulder strength, but one of my favorites is holding planks or moving back and forward between plank and beast pose,” Teragawa says.
To practice this, try a plank to beast pose:
- From a high plank position, maintain a tight core and long spine.
- Bend your knees and shoot your hips back to hover over your heels as closely as you can.
- Keep your knees off of the floor and your arms extended as you push into your fingers, so your entire upper body stays engaged.
- Continue to shift forward and back between plank and beast.
- Try this for 15 to 20 seconds at a time and let the heat build in your shoulders.
5. You need to improve your balance
To lift your feet off the ground in crow pose, you need both strength and balance. To practice balancing on your hands, there are a few different tactics and props you can use.
First, try using a yoga block under your feet.
“Placing blocks under your feet while preparing for crow pose helps significantly as it allows your hips to lift higher than your shoulders, while still being supported,” Teragawa says. “This lets you play with what it feels like to place more weight in your hands and shoulders with much more confidence.”
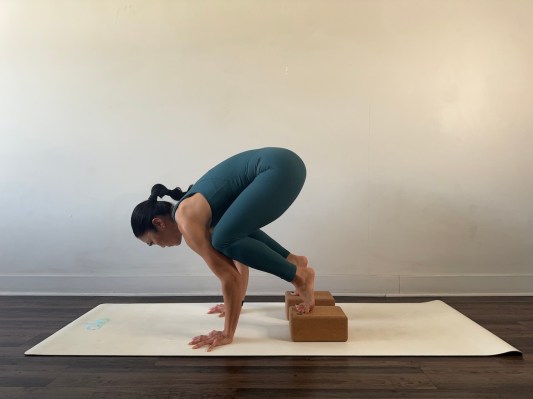
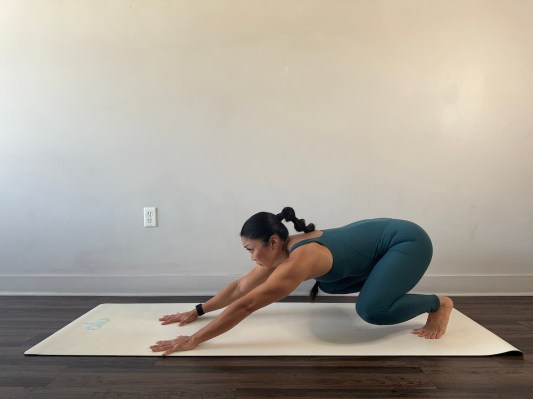
- Begin in a low squat with a yoga block under each foot. Place your hands on the ground shoulder-width apart with fingers spread wide. Have your feet wider than your shoulders.
- Come up to your tiptoes. Make sure your knees are in toward your rib cage.
- Shift forward, bringing your shoulders over the creases of the wrists. Squeeze your knees into your upper triceps.
- Keep your neck neutral.
Next, practice walking out your crow pose to start putting more weight on your hands:
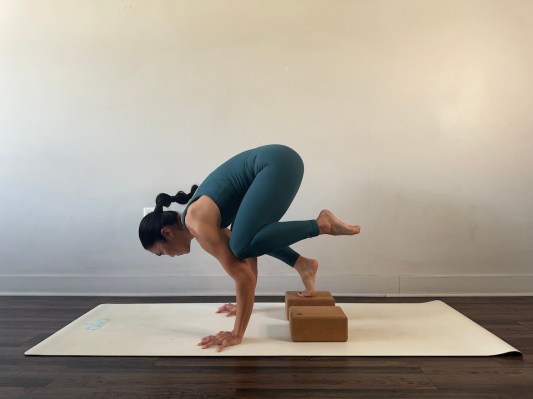
- Begin in a low squat with a yoga block under each foot. Place your hands on the ground shoulder-width apart with fingers spread wide. Have your feet wider than your shoulders.
- Come up to your tiptoes. Make sure your knees are in toward your rib cage.
- Shift forward, bringing your shoulders over the creases of the wrists. Squeeze your knees into your upper triceps.
- Lift one foot off the block. Place it back down.
- Lift your other foot off the block. Place it back down.
- Do this slowly so you can feel your weight shift slightly and start to understand where you need to push into the floor more with your hands or tighten your abdominals.
Finally, practice with a block under your forehead, which helps you practice getting your feet off the ground without worrying about falling forward.
“Because your forehead is already gently leaning on something, you get to have the support as you practice lifting your head away from the block a little,” Teragawa says. “You get the feeling of flying in crow without the fear of falling.”
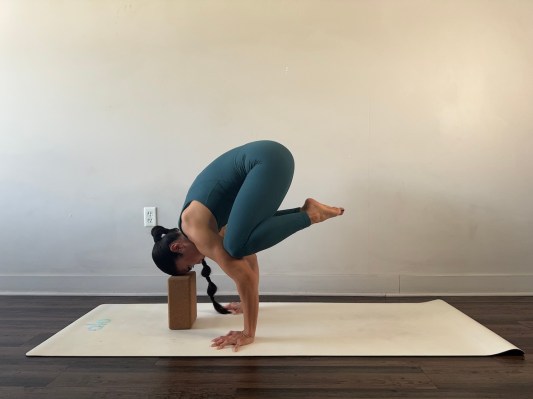
- Begin in a low squat with a yoga block in front of you, vertically.
- Place your hands on the ground shoulder-width apart with fingers spread wide. Have your feet wider than your shoulders.
- Come up to your tiptoes. Keep your knees in toward your rib cage.
- Shift forward, bringing your shoulders over the creases of the wrists. Squeeze your knees into your upper triceps.
- Rest your forehead on the top of the yoga block.
- Draw one foot away from the floor, then the other, bringing your big toes together.
- Keep your neck neutral.
6. You gaze downward
Where your eyes go, your body will follow.
“If you choose to look down at your feet, you are likely to fall forward, as our heads are heavy,” Teragawa says. “Try to keep your gaze up and out to encourage the body to stay up.”
Practice pushing the floor away with your hands and look forward past your fingertips before you lift your feet off the floor.
“This way, as you do start to lift your feet, your body can already adjust to the center of gravity you are creating with your gaze forward,” Teragawa says.
- Begin in a low squat.
- Place your hands on the ground shoulder-width apart with fingers spread wide. Have your feet wider than your shoulders.
- Come up to your tiptoes. Keep your knees in toward your rib cage.
- Shift forward, bringing your shoulders over the creases of the wrists. Squeeze your knees into your upper triceps.
- Draw one foot away from the floor, then the other, bringing your big toes together.
- Keep your neck neutral and look at your hands, not the ground.
Well+Good articles reference scientific, reliable, recent, robust studies to back up the information we share. You can trust us along your wellness journey.
- Cole AK, Pearson T, Knowlton M. Comparing Aerobic Exercise with Yoga in Anxiety Reduction: An Integrative Review. Issues Ment Health Nurs. 2022 Mar;43(3):282-287. doi: 10.1080/01612840.2021.1965269. Epub 2021 Aug 26. PMID: 34436979.
- Baklouti S, Fekih-Romdhane F, Guelmami N, Bonsaksen T, Baklouti H, Aloui A, Masmoudi L, Souissi N, Jarraya M. The effect of web-based Hatha yoga on psychological distress and sleep quality in older adults: A randomized controlled trial. Complement Ther Clin Pract. 2023 Feb;50:101715. doi: 10.1016/j.ctcp.2022.101715. Epub 2022 Dec 13. PMID: 36521407; PMCID: PMC9744484.
Source: Well and Good