


Quick Answer
- You can connect Roku to the Projector using an HDMI cable. If your projector lacks an HDMI port, you can connect it to Roku using a different cable according to the ports available.
- Set up Roku to start streaming it on the connected projector.
Roku is a streaming device comprising many features and offers users the ability to watch their desired content in any place. You can explore all these contents on a big screen by connecting the Roku device to a Projector. Using an HDMI cable is a straightforward method to combine these two devices. Apart from this, there are multiple methods available to set up Roku to Projector.
With Projector, you can unblock a mesmerizing theatrical experience anywhere. Besides watching content, you can play games on a large screen by installing game apps from the Roku Channel Store.
In this guide, you will learn all the possible ways to connect Roku to Projector.
How to Connect Roku to Projector via HDMI Cable
If you have a Roku Stick, you can directly connect it to the projector’s HDMI port. Other models like Roku Express or Roku Ultra will require an HDMI cable to connect it to the projector.
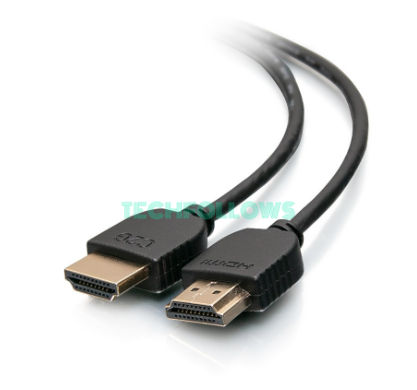
1. Connect one end of the HDMI cable to the Projector’s HDMI port.
2. Insert the other end of the HDMI cable into the Roku device’s HDMI port.
3. Power ON both devices and go to the projector Settings.
4. Select the HDMI that is connected to your Roku device.
5. Once done, you can view the Roku icon on the projected screen.
6. Provide the device with a stable WiFi connection and pair the Roku remote.
7. Then, sign in to your Roku account and start accessing the content on a big screen.
How to Connect Roku to Projector Via VGA Cable
You can use a VGA cable when your projector lacks an HDMI port. Also, the VGA adaptor differs for each Roku model, so get the one that suits your device.
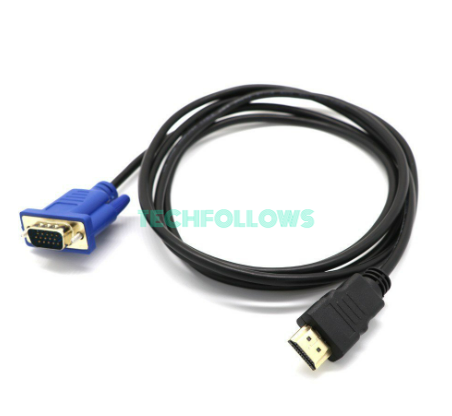
1. Connect the cable’s HDMI side to Roku and insert the VGA adaptor into the Projector’s VGA port.
2. VGA does not carry audio. So, you have to connect the audio separately to your projector, which depends on the HDMI to VGA adaptor that you use.
3. Connect the projector’s Power cable to the power socket and turn ON the devices.
4. Then, connect Roku to WiFi and complete pairing to its remote.
5. Now, you can add your desired channel app on Roku and stream it on your projected screen.
How to Connect Roku to Projector via Component Cable
If your projector has component ports, you can follow these steps.
1. Connect the Roku device to the Component adapter using an HDMI cable.
2. Now, connect the component adapter and the Projector using the Component cable.
3. Turn on the devices after connecting the cables firmly.
4. Ensure you connect Roku to WiFi and pair its remote to watch its contents.
How to Connect Roku to Projector via DVI-D Cable
Check whether your Projector has a DVI-D port. If yes, you can use these steps to connect it to Roku.
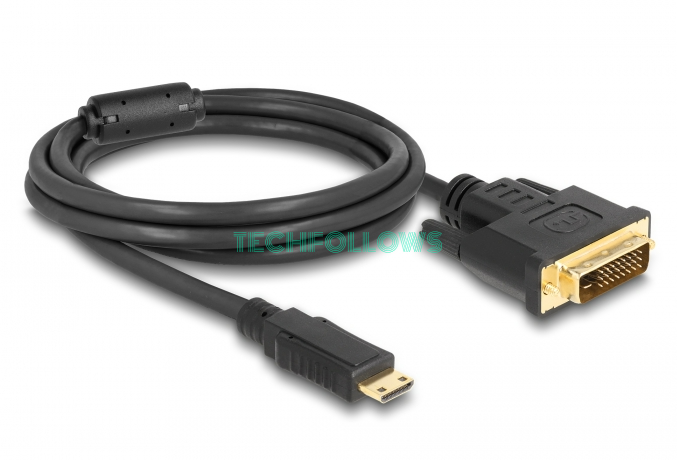
1. Insert the HDMI side of the DVI-D cable into the Roku device.
2. Connect the DVI-D adapter side to the Projector’s DVI-D port.
3. Power ON the devices and complete setting up the Roku to stream more than thousands of channels.
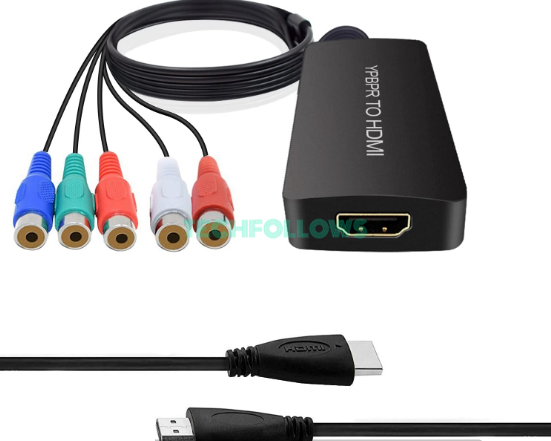
How to Connect Roku to Projector via RCA Cable
Look for your Projector’s RCA ports (Red, White, and Yellow). Now, follow these steps to connect using HDMI to RCA Adapter.
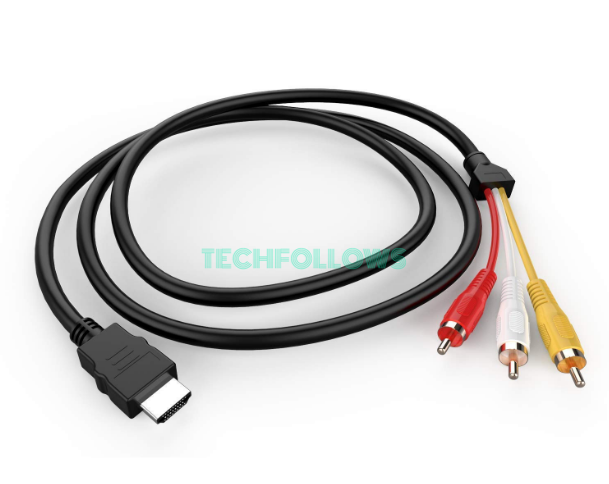
1. Use an HDMI Cable to connect Roku to the HDMI to RCA Adapter.
2. With the help of an RCA cable, connect the Adapter to the Projector.
3. Make sure to follow the color code to avoid any issues.
4. Finally, complete the set-up process as mentioned in the previous methods to unlock Roku contents on the projected screen.
If your Projector has an S-Video port, you have to use HDMI to S-Video Adapter to connect Roku to your Projector.
How to Connect Roku to Projector Wirelessly
With the help of any Wireless Digital Kit, you can wirelessly connect Roku to the Projector.
1. Plug the HDMI cable into Roku and insert the other end into the HDMI port on the transmitter. For the Roku Stick, you can directly insert it into the transmitter’s HDMI port.
2. Use another HDMI cable to connect the A/V receiver to your Projector.
3. Connect both transmitter and receiver using the power adapter’s DC socket.
4. Turn ON the devices and select the particular HDMI Settings on the Projector to which you have connected the receiver.
5. The Roku icon will display on the screen when it is successfully connected.
How to Connect Roku and Projector to HDMI Audio Extractor
Most of the time, projector speakers have trouble supporting the audio from the connected device like Roku. That’s when the HDMI Audio extractor comes in handy to fix this issue.
1. Locate the HDMI input port on the HDMI audio extractor and connect the Roku device directly or using a HDMI cable.
2. With another HDMI Cable, connect the Projector’s HDMI input port to the audio extractor’s HDMI output port.
3. Connect all the devices to the Power source and turn it ON.
4. The Projector screen will display the Roku icon if the connections are made correctly.
Now, check the type of audio port present on the audio extractor’s adapter and use the cable accordingly to connect the external speaker to the HDMI audio extractor. The audio extractor adapter probably has one of the ports from a 3.5 mm jack, SPDIF/Optical out, or RCA ports.
FAQ
The Roku remote will not work if it has any damage or improper setup. Check the connection setup and remote’s working condition, then try repairing it to your projector.
Using an HDMI Audio Extractor, you can follow the steps mentioned in this article to connect the Roku and Projector with a Soundbar.
Disclosure: If we like a product or service, we might refer them to our readers via an affiliate link, which means we may receive a referral commission from the sale if you buy the product that we recommended, read more about that in our affiliate disclosure.
Read More: World News | Entertainment News | Celeb News
Tech Follows